

Bowmanville Metal Roof: Triple-Layer Protection
Project Details:
-
Location: William Cowles Dr, Bowmanville
-
Duration: 7 days (in winter)
-
Roof Area: 1,700 sq. ft.
-
Material: ThyssenKrupp 25-gauge G90 galvanized steel
-
Design: Monterey Metal Tile
-
Color: Black
-
Cost: 10,500–12,500 CAD
Project Overview
Recently, we completed another metal roof installation project on a homeowner's roof who heard of our services through referral by a past client and that is always the greatest testimonial to the trust that we have garnered over the years in the quality of our service. The roof we installed was an older roof that had been prone to leaks and deterioration; this made the homeowner concerned about the ability of the roof to remain durable for a long period of time. We fixed the problem by employing a three-part system; the inner layer consisted of the Strotex Dynamic waterproofing membrane while the outer layers are made up of the existing shingles.
Project Challenges
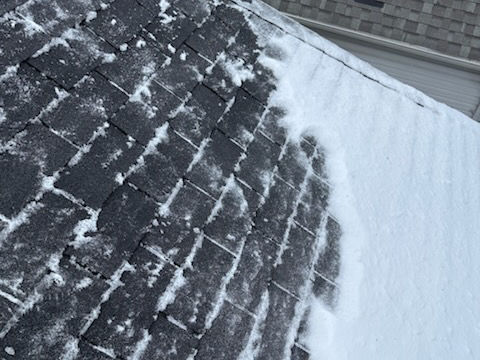
The main challenge was the winter weather. It was cold, and some days it was snowing, which required careful planning and timing. We had to make sure every step was done properly to keep the roof protected despite the conditions.
Installation Process
Stage 2: Roof Reinforcement & Ventilation
Next, we installed double wood strapping across the entire roof surface. This mechanically secured the membrane, reinforced the structure, and created proper airflow beneath the metal panels to ensure long-term performance and ventilation efficiency.


Stage 1: Waterproofing Foundation
We began by installing the Strotex Dynamic waterproofing membrane directly over the existing shingles, creating an additional protective layer beneath the future metal system. This step formed the base of a triple-layer defense, significantly strengthening the roof’s resistance to leaks and moisture intrusion.


Stage 3: Metal Panel Installation
With the base prepared, we then proceeded to install the metal panels. In doing so, they were positioned and overlapped accordingly to deliver a watertight seal. Valleys were also implemented, and the roof system was prepared for the incorporation of the ridge caps.
Stage 4: Ridge Protection & Final Details
To complete the system, we installed ridge caps along with a specialized vent membrane beneath them to protect the attic from dust, insects, and snow infiltration while preserving proper ventilation. These steps sealed all of the previous steps and fully protected the metal roof.


Results
The project was completed during the winter season and the homeowner was very happy with the results. The owner also left us a 5 star review and recommended MROOF on social media, which we truly appreciate. Feedback like this is always rewarding and serves as strong motivation for our entire team.

Customer Review
Rating: .
5 stars from the homeowner
One of the homeowners shared their experience in a Google review
"
From the quote to the final product, it's been an absolute pleasure working with Vik, Ihor and the team. My roof is beautiful and my family can rest assured we are covered for the next 50 years! Highly recommend!!
READY TO BECOME ONE OF OUR SATISFIED CLIENTS?
Let's Discuss Your Roof Project
1 416 857-7143
1368 Blundell Rd, Mississauga, ON L4Y 1M5
Other Projects
Latest Posts


About Mroof
Mroof is a premium metal roofing contractor serving Toronto, the GTA, and Southern Ontario since 2024. We design, supply, and install standing seam and metal tile systems engineered for Ontario's hail, wind, snow, and freeze-thaw conditions. Every project is delivered by manufacturer-certified installers and backed by a transferable workmanship warranty alongside 30 to 50 year finish warranties from the panel manufacturer. Free on-site assessments across the GTA. Call +1 416 857-7143 or request a quote.